Jackdaws At Dusk

Jackdaws At Dusk

Tuesday 19 April 2011

The final image for the Minimalist Seascape project


This photo kind of shows the neon glow that I was referring to in the previous post. I think this has something to do with the fact that there is such a difference between the midnight blue/black on the sides and the shimmering multi hued blue in the centre.


For some reason the posts are showing the photos as verticals instead of horizontals, which they are meant to be, but I have to admit that once I'd finished the painting and was storing it upright to dry I found just as much satisfaction out of viewing the painting vertically was as I did viewing it horizontally. It brings me back to the comments I was making about the work of Barnett Newman and the painting Uriel which has vertical zips but works for me as a valid image of the sea/sky/shore.


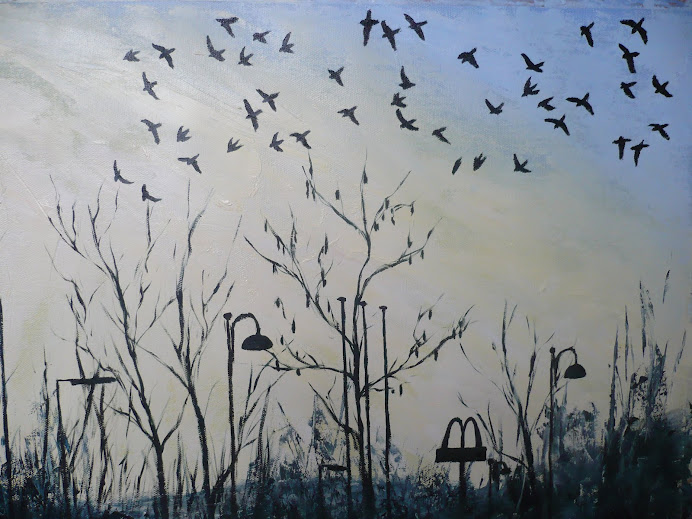
When I asked my husband for his interpretation of the painting he said it reminded him of the sea at night, and also the haze of atmosphere above the earth when viewed from space. I like the fact that it can be viewed in these different ways and is open to interpretation.


It also unexpectedly reminds me of the painting Untitled, 1917/1918 by Olga Rosanova, who I also saw in the Abstract Art book by Mel Gooding, and is shown in this link here,


For a project that could be viewed in quite a limited way I'm pleased with the outcome and the final image.

Dragging the Paint

I'd done numerous studies in my sketchbook, in oils and acrylics, to experiment with the technique of dragging the paint, but nothing quite prepared me for using the plastering tool on such a big scale. Not even Elfyn Lewis' paintings are as big as the version I did.


This first photo shows the very first swipe that I did. You can see how the blue starts to bleed into the white, which I wanted to happen, but you can also see how there's not enough blue to cover the whole of the canvas. Looking back at the previous photo, on the previous post, I can see that I applied no where near enough paint to cover an A1 image. But hindsight is a wonderful thing. What I ended up having to do was apply more blue paint as I was going along, but this resulted in patchy areas of paint, where they weren't mixed

in well with the rest of the paint, this can be seen on the edges of the final painting.


This second photo shows the middle section after a few most swipes, and it's interesting as it's shows how all the different tones of blue start to flicker when mixed with the white paint. In the final image this results in an almost neon glow which I hadn't anticipated and which I'm really pleased with.


Preparing to Paint.

This first photo shows the layers of acrylic I'd applied, leaving each one to dry before adding another. They were applied rather thinly, mixed with a bit of water, as I wanted to keep the canvas as smooth as possible in order to not have any lumps that would snag the plastering tool when dragging the oils across the canvas in the last stage.


At the final moment I decided to add a layer of black paint on top of all these colours because I felt that I wanted to preserve the purity of the blue oil paints that would be the top layer. I felt that the mixture or reds and greens would be a distraction and not a complimentary element. I'm glad I painted so many layers of acrylic in the first place as it's given such stability to the painting, and depth of colour that wouldn't have been so effective if I had layered only black paint underneath.

This second photo shows the oil paints laid out on the canvas ready to be dragged across. The four horizontal stripes are the four different coloured blues that I used; french ultramarine, pthalo blue, windsor blue and pthalo turquoise. The white was for the stripe cutting through the middle of these blues. You can see the black paint underneath, still showing glimmers of other colours such as the reds and blues, but I'm now glad in hindsight that I made it this dark.

Preparing the canvas for the Minimalist Seascape

Having also studied the work of Mark Rothko, who was linked with Barnett Newman and the Abstract Expressionists, I'd noticed the layering of coloured paints that Rothko used. Newman's work had much cleaner lines and a thicker, less transparent layering of paint, possibly applied with a roller as it looks so smooth. Rothko's was more likely applied with a large brush, ground and rubbed into the canvas to create areas where the base coat of paint was allowed to glimmer through, affecting the colour that was applied on top, either making is darker or lighter.

After experimenting in my sketchbook with the different versions of the composition and technique that I was going to use for the final painting, I decided that I needed to introduce colour into the ground for my painting. So I layered black, green, red and blue acrylics. This was also in order to make the oils on top richer and and more glossy, so creating a thick luminous sheet of paint, imitating the sheen of water.


This photo was taken before I'd applied any paint, apart from a base coat of emulsion, and it shows the support that I'd stuck the canvas to in order to keep it completely flat, and it also shows the builders plastering tool that I was going to use to scrape the paint across. I didn't want to stretch the canvas onto a wooden frame because the fabric would have sunk in the middle when dragging the plastering tool across it, and there would have been lines on the edges where the wooden beams underneath would have touched the canvas with the force of pressing down. So the best alternative I could think of was to measure it up based on the biggest wooden stretchers I have, so that it could be stretched at a later date, and to tape it all in place, masking off the areas that I didn't want paint on, which corresponded with the edges of the wooden frame.