Jackdaws At Dusk

Jackdaws At Dusk

Tuesday 30 August 2011

The Final Painting


With so many different techniques and technical problems to get used to, this was without a doubt the hardest painting to get right.


An unusual aspect with defining the portraits of the figures was the fact that I could only paint the lightest part of the features, as the paint underneath was representing the shadows on the faces, and this was quite tricky to get used to.


Having read Man With a Blue Scarf recently, which is an account by Martin Gayford of posing for a portrait by Lucian Freud, Gayford includes a section from a 1954 article in Encounter where Freud explains his thought processes behind painting a portrait;


"The artist who tries to serve nature is only an executive artist. And, since the model he so faithfully copies is not going to be hung up next to the picture, since the picture is going to be there on its own, it is of no interest whether it is an accurate copy of the model." (Gayford, 2010, p.48)


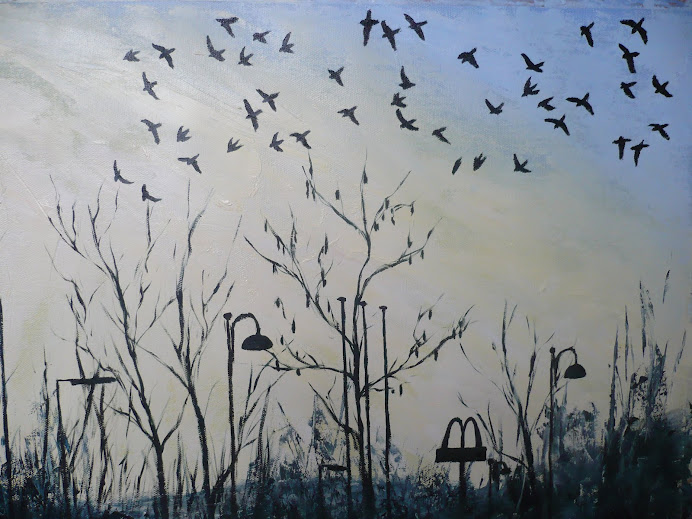
It must be said that the figure on the bottom left of my painting is the only one who actually looks like the person I was trying to depict. The other three only have a passing resemblance. So it was a reassurance to read the words of Freud with regard to getting a likeness. It allowed me to concentrate on other aspects of the painting, such as atmosphere, colour and tone.


The three dimensional aspect of the painting is obviously difficult to get across in a photo, which is why I tried to take these photos from a lower angle, it can be seen in some places where the pond weed can be viewed both below and above the perspex, which I think is the most effective aspect of the painting. Scratching through the top layer of acrylic was also used to suggest the forms of the grass and this too has worked well.


There are many techniques and ideas used and discovered during the making of this painting that I hope to carry forward into future paintings and future courses.

Gerhard Richter in the Tate Modern


These are two of my logbook pages sketched and annotated when I was in the Tate Modern on the 13th of August. Above that is a photo of the room in the Tate, featuring paintings Cage 1 - 6, 2006, copyright the Tate Modern.

Seeing the paintings by Richter in the flesh was very different to what I expected them to be. There were a lot more variations and subtleties of colour that the photos of his paintings don't bring across. Two out of the three of my sketches - the green one and the yellow one - can be seen in the photo of the gallery, but the oranges and reds in these paintings seem to have been lost in their translation to photographic image.

The paintings really are enormous, I'd estimate about seven foot by seven foot, there were six in total in the room, two on each of the wide walls and one each on the narow walls. It made sitting on the benches in the middle of the room, where I sat for about an hour, feel like you were sitting in a goldfish bowl, or under the sea, surrounded by water on all sides. It validified my decision to include his work as reference for my under water painting.

Saturday 27 August 2011

Embedding the Perspex into the Canvas


Once I'd outlined the figures onto the top layer on perspex I could start applying the pond weed to the bottom layer. I did this by painting roughly with a small sable brush then rubbing over it with oil pastels. I then splattered green and brown acrylic paint to represent small parts of duck weed that grow on the surface of the water.


Once I was happy with this bottom layer I started preparing the canvas. I sized, but didn't prime it - as I wanted the paint to be able to breath and not be sealed in by layers of emulsion. I then painted a base coat of brown paint so that the white canvas wouldn't show through. This photo on the left shows acrylic paint squeezed onto the canvas, along with white PVA glue.


This second photo shows the paint once it had been scrapped across with the plastering tool. The reds and greens are contrasting nicely and help to lift the browns and blacks from looking too muddy.


Embedding the perspex into the canvas was an interesting process as it was surprising how many air bubbles got trapped underneath and how much effort was involved with forcing them out. I'm glad that I didn't prime the canvas now because the tiny gaps left in the canvas allowed the air to be pushed out through the back easier than if it had all been sealed with paint.


This close up shows the interesting effect of the flickers of colour from the dried paint on the perspex reacting with the wet paint on the canvas. It reminds me of a nebula.


Starting the Final Painting for the Group Portrait

This is the first stage of the final painting. This photo on the left shows the A2 acrylic study painted onto card on the left, with the beginning of the perspex painting the right. I used the large study as an image to be traced onto the perspex by laying the perspex sheet on top of the large study and drawing around the image with oil pastel. I worked on it this way because alterations that needed doing on perspex were much harder do than alterations on paper.

Once the oil pastel had been drawn on I applied the first coats of acrylic paint onto the perspex, using the same kind of brush strokes as Miro in his oil on copper paintings, using a hog's hair brush so that each one of the brush strokes would be visible.


Varnishing the Perspex

There was one more logistical problem with painting onto perspex; the acrylic paint was very easy to scrape off. This was a big problem because of the durability needed for a painting that would be sent through the post for assessment. The only solution that I could think of was to coat the perspex and acrylic paint with a layer of acrylic varnish, but this itself threw up a problem because it resulted in less transparency through the perspex.

This photo on the left shows the small perspex study on the top, with an unpainted sheet of perspex sandwiched up against it underneath. The small study has been varnished, whilst the unpainted sheet has been varnished on only one side - the left hand side. It can be seen that there is a cloudy sheet masking the black paint underneath. I think the varnish on the painted study is slightly more cloudy because the acrylic paint hadn't dried for the full 24 hours before applying the varnish, and so it smudged slightly.


The poor visibility from the acrylic varnish is made even more obvious by the way it distorts light when looking through it into the distance, as in this photo on the left.

However, I've come to the decision that this distorting effect is actually quite appropriate for a painting depicting water in a pond, after all when is pond water ever crystal clear? For the parts of the perspex painting that are left free of acrylic paint, the varnish will act as a thin veil separating the lower levels of paint from the upper levels of paint.

Thursday 25 August 2011

Sample on Perspex


Having never painted onto perspex before, I wanted to be sure that the logistics of it were thought through before starting the full size painting. My plan was to incorporate three layers of paint - the canvas, the front of the perspex and also the back of the perspex - but I wanted to make sure that painting on the back of the perspex would actually contribute something constructive to the image.

This first photo shows one of the portraits roughly painted onto the front layer of perspex. There are strands and splatters of green on the back layer, representing the pond weed, whilst the dark paint underneath is a layer of canvas painted with acrylic, representing the mud. I was satisfied at this stage that these three layers worked well together.

Logistically I had a problem with how to stick the canvas and perspex together to made a solid and sturdy whole. Initially I'd thought to use glue around the edges, but this didn't seem satisfactory as I thought the glue would be visible. Researching further into the work of Brendan Stuart Burns, who also uses perspex in his aquatic paintings, I decided to emulate his technique and completely embed the perspex in paint, thereby using the paint as an adhesive.


This second photo shows the thick layer of paint that was prepared ready to embed the perspex into. I mixed in a lot of PVA glue to make absolutely sure that the two surfaces would bond (Burns also uses wax in his oil and perspex paintings which contributes to the adhesive properties).

This third photo shows the plastering tool, used as Gerhard Richter does, to drag the paint across the canvas - it also served to mix the paint and glue together, creating an even distribution of glue.

The final photo shows the small study embedded in the paint. The effect that I'm most pleased with is that the bottom layer of paint still looks wet and fluid. This is very different to the study shown in the first photo above, where the texture of the canvas can be seen through the transparent perspex. Though the full three dimensional effect isn't noticeable in a photo of the study it is very effective when seen in the flesh. The perspex itself is 5 mm thick, so there is quite a contrast between the front and the back layers, mimicking the effect of looking through water. Seeing the three layers of paint interacting together validated my decision to paint on the back of the perspex, as it would have been impossible to paint the strand and splatters of pond weed onto the wet layer of paint used on the canvas.


Sunday 21 August 2011

Painting on Copper


Joan Miro The Two Philosophers Oil on copper. 1936. Image from the MoMA website.


Painting onto perspex has brough up an issue that needs to be dealt with - should I camouflage the brush strokes or incorporate them into the texture of the painting? In my small perspex study I tried to camouflage the marks by smudging them with a cloth and spraying with water so they would blend together. However seeing this painting by Joan Miro on display in the Tate Modern made me think that incorporating the brush strokes would be worth experimenting with.


The Two Philosophers is painted with oil on a sheet of copper which creates a completely smooth surface for the paint to glide on and prevents the paint from sinking in, therefore each one of the brushstrokes is clearly visible. This smooth non-porous surface is very similar to a sheet of perspex, so it's a technique that I'll be including in my work.

Friday 5 August 2011

Gerhard Richter


Untitled. Image taken from the Bridgeman Education site.


Gallery Exhibiting work by Gerhard Richter, Hamburg Kunsthall, Hamburg, Germany, c. 1995. Image from the Bridgeman Education Site.


Gerhard Richter S With Child 1995 Oil on canvas, 52 x 56 cm. Image from the Bridgeman Education site.


This link to the Gerhard Richter website includes a photo at the bottom centre of the page showing Richter dragging one of the large squgeegee tools that he uses to add more paint to the canvas whilst also dislodging and redistributing paint already applied underneath. It's the technique he would have used for image Untitled which I included above. Though no dimension sizes are given on the Bridgeman site it's obviously very large from seeing it in the context of the Hamburg Kunsthall in relation to the other painting.


The Tate Modern have a room of his paintings on display at the moment which will be very interesting to view when I go there next week.

At the moment I'm visualising using this technique of applying multiple layers of paint to represent the depths of the water, and on top of this will be applied the layer of perspex with further painting applied on top for the reflections of the figures looking down, and the pond life growing around the edges.


The painting S with Child is particularly interesting for its combination of representational painting and the blurring technique involving the squeegee. This would work very effectively for capturing the ephemeral reflections on the surface of the perspex.

Saturday 16 July 2011

lucien freud and A.N. wilson

http://www.dailymail.co.uk/news/article-1019795/What-dreadful-painting-tells-art-corrupting-power-money-mans-contempt-female-sex.html

The article that I used for the Critical Review on Lucian Freud. Used it as a counter argument for the "truth telling" in Freud's paintings.

Tuesday 19 April 2011

The final image for the Minimalist Seascape project


This photo kind of shows the neon glow that I was referring to in the previous post. I think this has something to do with the fact that there is such a difference between the midnight blue/black on the sides and the shimmering multi hued blue in the centre.


For some reason the posts are showing the photos as verticals instead of horizontals, which they are meant to be, but I have to admit that once I'd finished the painting and was storing it upright to dry I found just as much satisfaction out of viewing the painting vertically was as I did viewing it horizontally. It brings me back to the comments I was making about the work of Barnett Newman and the painting Uriel which has vertical zips but works for me as a valid image of the sea/sky/shore.


When I asked my husband for his interpretation of the painting he said it reminded him of the sea at night, and also the haze of atmosphere above the earth when viewed from space. I like the fact that it can be viewed in these different ways and is open to interpretation.


It also unexpectedly reminds me of the painting Untitled, 1917/1918 by Olga Rosanova, who I also saw in the Abstract Art book by Mel Gooding, and is shown in this link here,


For a project that could be viewed in quite a limited way I'm pleased with the outcome and the final image.

Dragging the Paint

I'd done numerous studies in my sketchbook, in oils and acrylics, to experiment with the technique of dragging the paint, but nothing quite prepared me for using the plastering tool on such a big scale. Not even Elfyn Lewis' paintings are as big as the version I did.


This first photo shows the very first swipe that I did. You can see how the blue starts to bleed into the white, which I wanted to happen, but you can also see how there's not enough blue to cover the whole of the canvas. Looking back at the previous photo, on the previous post, I can see that I applied no where near enough paint to cover an A1 image. But hindsight is a wonderful thing. What I ended up having to do was apply more blue paint as I was going along, but this resulted in patchy areas of paint, where they weren't mixed

in well with the rest of the paint, this can be seen on the edges of the final painting.


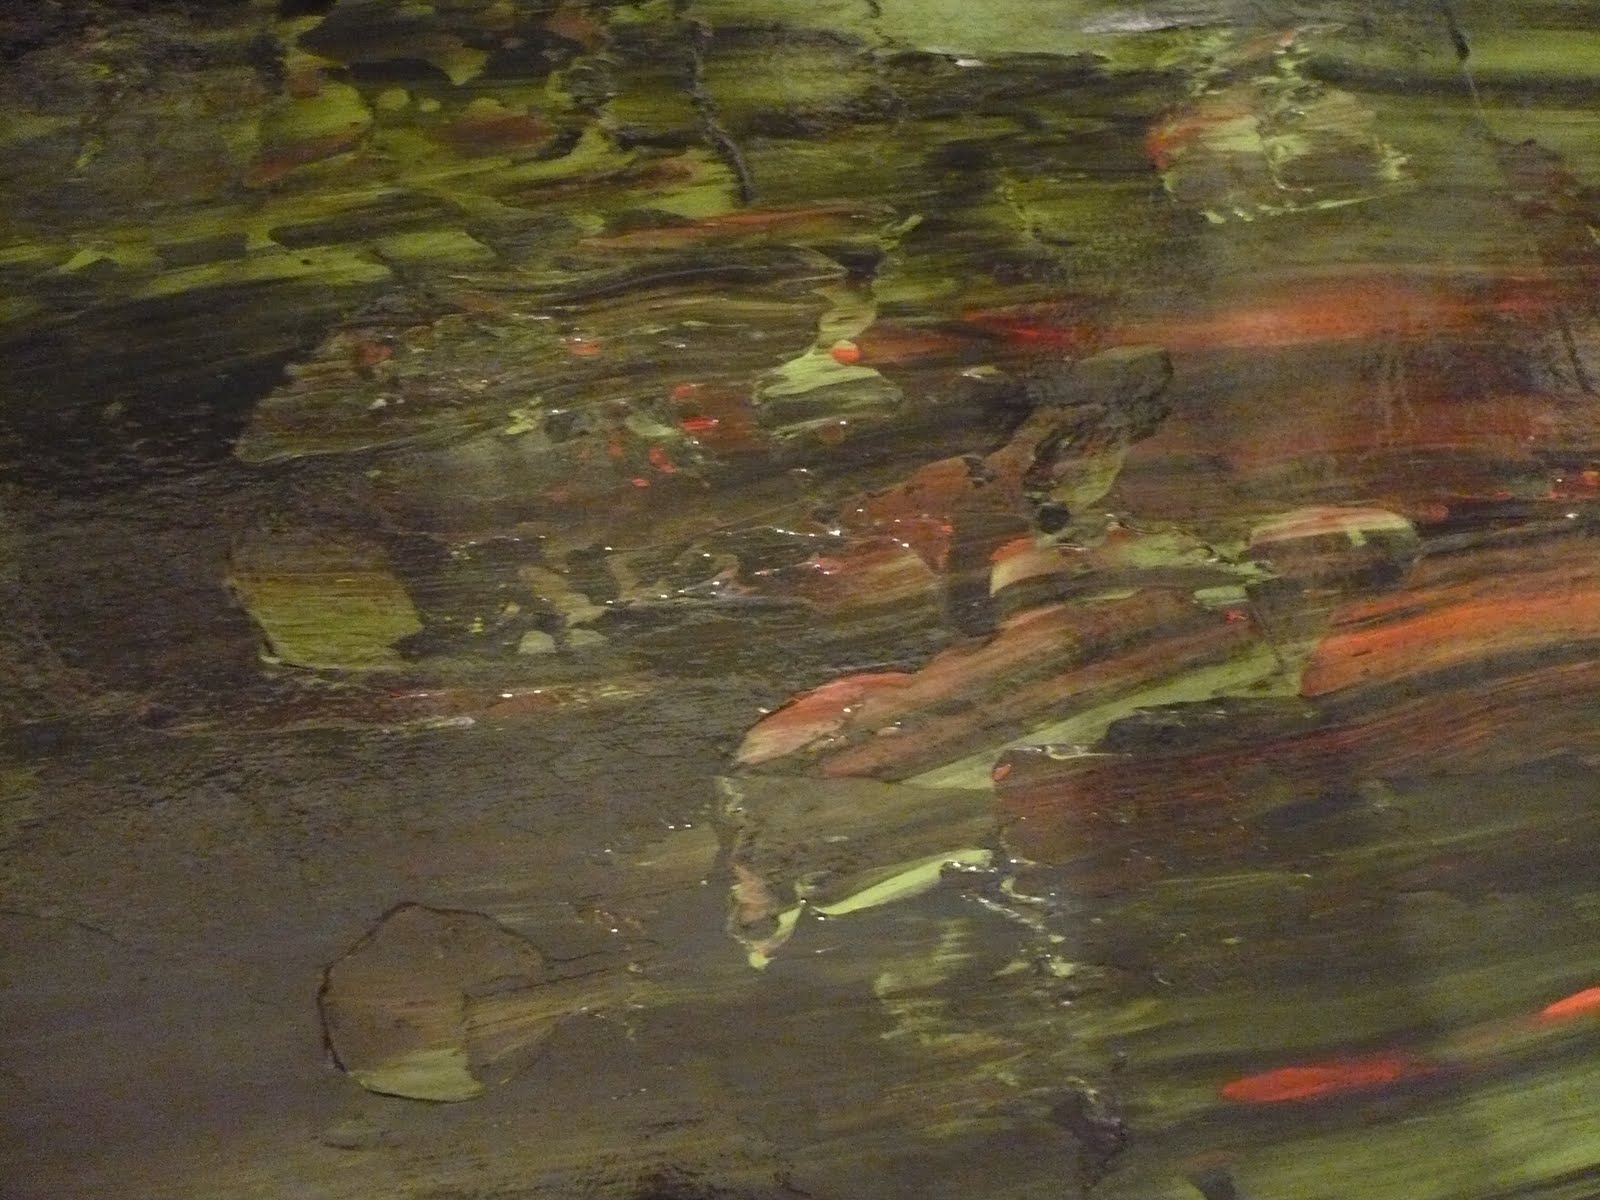
This second photo shows the middle section after a few most swipes, and it's interesting as it's shows how all the different tones of blue start to flicker when mixed with the white paint. In the final image this results in an almost neon glow which I hadn't anticipated and which I'm really pleased with.


Preparing to Paint.

This first photo shows the layers of acrylic I'd applied, leaving each one to dry before adding another. They were applied rather thinly, mixed with a bit of water, as I wanted to keep the canvas as smooth as possible in order to not have any lumps that would snag the plastering tool when dragging the oils across the canvas in the last stage.


At the final moment I decided to add a layer of black paint on top of all these colours because I felt that I wanted to preserve the purity of the blue oil paints that would be the top layer. I felt that the mixture or reds and greens would be a distraction and not a complimentary element. I'm glad I painted so many layers of acrylic in the first place as it's given such stability to the painting, and depth of colour that wouldn't have been so effective if I had layered only black paint underneath.

This second photo shows the oil paints laid out on the canvas ready to be dragged across. The four horizontal stripes are the four different coloured blues that I used; french ultramarine, pthalo blue, windsor blue and pthalo turquoise. The white was for the stripe cutting through the middle of these blues. You can see the black paint underneath, still showing glimmers of other colours such as the reds and blues, but I'm now glad in hindsight that I made it this dark.

Preparing the canvas for the Minimalist Seascape

Having also studied the work of Mark Rothko, who was linked with Barnett Newman and the Abstract Expressionists, I'd noticed the layering of coloured paints that Rothko used. Newman's work had much cleaner lines and a thicker, less transparent layering of paint, possibly applied with a roller as it looks so smooth. Rothko's was more likely applied with a large brush, ground and rubbed into the canvas to create areas where the base coat of paint was allowed to glimmer through, affecting the colour that was applied on top, either making is darker or lighter.

After experimenting in my sketchbook with the different versions of the composition and technique that I was going to use for the final painting, I decided that I needed to introduce colour into the ground for my painting. So I layered black, green, red and blue acrylics. This was also in order to make the oils on top richer and and more glossy, so creating a thick luminous sheet of paint, imitating the sheen of water.


This photo was taken before I'd applied any paint, apart from a base coat of emulsion, and it shows the support that I'd stuck the canvas to in order to keep it completely flat, and it also shows the builders plastering tool that I was going to use to scrape the paint across. I didn't want to stretch the canvas onto a wooden frame because the fabric would have sunk in the middle when dragging the plastering tool across it, and there would have been lines on the edges where the wooden beams underneath would have touched the canvas with the force of pressing down. So the best alternative I could think of was to measure it up based on the biggest wooden stretchers I have, so that it could be stretched at a later date, and to tape it all in place, masking off the areas that I didn't want paint on, which corresponded with the edges of the wooden frame.

Monday 21 March 2011

Barnett Newman and Franz Kline


Uriel, 1955, by Franz Kline and Zinc Door, 1961, by Barnett Newman at the Kunsthalle, Hamburg, Germany. Photo courtesy of Bridgeman Education.


Reading the book Abstract Art by Mel Gooding I became interested in the work of Barnett Newman, which seemed to have such an immense scale and an interesting use of splitting the canvas up unto smaller strips, which were called "zips." Seeing them in a book is very different to seeing the real thing, and this photo form the Bridgeman site gives a good idea of the scale of the painting. It's dimensions are 243.8 by 548.6cm which is impossible to visualise from the close up photo of it which is also on the Bridgeman site.


Uriel By Barnett Newman, photo courtesy of the Bridgeman Site.


However this detailed photo does give more information about the colour and construction of the painting, again showing zips on the side, though instead of the standard one zip in most of his other paintings, this time there are five; two black, town white and one blue.


This painting stood out for me as an abstracted view of the ocean and shoreline, even seen with the lines vertical it seems to shine with light and water. Viewed on its side, so the stripes are horizontal, creates an even more convincing illusion of the sea. This also fed into my interpretation of a Minimalist Seascape.

Tuesday 15 March 2011

Paint a Minimalist Seascape

http://www.oriel.org.uk/Gallery/Gallery-ARTISTS/Profiles/Portfolio/Lewis.aspx#/CMSPages/GetFile.aspx?guid=e30aec5a-73bd-4fed-a4c1-03a8cc9eb395

I've decided to do the Minimalist Seascape project for this part of the course. I was drawn to it at the thought of booking the day off from the children to go and draw by the beach. But reading the coursebook I realised that representing the view isn't the primary aim of this project. So I filled pages of my sketchbook with images based on splitting the rectangle into different shaded sections.
The colours and the application of paint came next and this is where Elfyn Lewis' work came into play. I copied a few of him images in my sketchbook and even tried to emulate the way he drags the paint across with the scrapers and squeegies that he uses. But there's nothing like the real thing, and this link above shows a selection of his actual work in a recent exhibition.
The third painting down (or third on the right of the small boxes on the bottom of the page) is called Moel Y Mor which is welsh for mound of the sea. Admittedly the painting doesn't look much like a mound or the sea but it has really intriguing use of paint and a solid sense of movement because of the way the paint has been dragged, so the allusions to water are there in an abstract way. The tonal contrast also really draws my to it and I see it as a valid beginning to experimenting with the Minimalist Seascape.

Wednesday 2 March 2011

Working on The Finished Painting


I added another layer of thin oils here, using Sansodor, a low odour thinner by Windsor and Newton, rather than turps.

The hand is looking a bit odd because it wasn't added in the original charcoal drawing on the canvas, so is a different colour to the skin on the face, plus the shape and size is wrong in composition to the head and body.

I added more layers of charcoal on top of the original layer of oil as I wanted it to mix in and accentuate the texture form the canvas.


More detail was added to the face, hair and hand. I wasn't able to change the proportions of the hand because it was already close to the edge of the canvas, plus the angle of the arm couldn't be changed any more because it was already bent quite far in. So I ended up making the head smaller which has made it look more in proportion to the body and hand.


I painted the detail for the eye, nose and ear quite quickly with thinned down paint. The ear was just a few squiggles, painted from memory, and I'm pleased with how much it looks like a ear. The contour and shadows on the face also work really well.


Keeping the bottom part of the painting loose and thin was important for me, having seen and studied the work of Augustus John and Eugene Carriere. The charcaol was left quite conspicuous here, which acts as a contrast to the detail in the top half of the figure.


Tuesday 1 March 2011

Oils on the Portrait

This is the first layer of paint, not that I'm planning on adding many more layers as I want to keep it thin and translucent like the work of Augustus John and Eugene Carriere. I purposefully didn't prime the canvas, just sized it with a layer of slightly watered down PVA glue. I did this for a few reasons.
Firstly I wanted to keep the texture from the canvas grain (it's heavy weight canvas with two threads woven in each direction) as this adds flickr to the texture of the paint, a bit like the texture of watercolour paper, where the paint doesn't sink into every part of the paper.
Secondly I wanted the more natural colour of the canvas to show through, as opposed to the clinical looking white primed canvas. I thought this would add to the skin tones, and also I've been inspired by the work of Augustus John who purposefully didn't paint every single part of the canvas or board, which I find interesting.
Thirdly, inspired by the later paintings of Gwen John, I wanted a dry matt finish for the paint, as opposed to glossy and shiny. There is a painting by hers called Girl in Profile which I'm slightly obsessed by. It's on display in the Museum on Cardiff and the texture and dryness of the paint fascinates me. Finding out from information in the Museum that she created her own chalky ground to paint on, which absorbed the oils from the paint, was really interesting.

Sketches and the Beginning of the Portrait Project.

Following on from researching the work of Eugene Carriere, Augustus and Gwen John and Paula Modersohn Becker, and after numerous sketches with different people in different poses I decided to make a start on the Portrait Project.


This is the sketch I decided to work from for the painting. I like the diagonal elements in the composition, especially where there is a v shape created by the angle of the face and the shoulder. The strong contrast that will result from the pale white sheet and the darker tones in the clothing and bedsheets is also what drew me to this image above the others that I had sketched.


When I came to sketching it onto the sized but un-primed canvas, 50 by 75 cm, I became aware that the area in the bottom right was just too empty. I had thought it would be an "interesting" emptiness, creating a contrast to the rest of the painting, but it just looked odd. So I added an arm (drawn from memory, not observation at the time) coming out at a right angle. This balanced out the composition well and I was happy to add the first layer of paint.

Having also been studying the work of Lucian Freud for my critical review (and group portrait for the last project) I decided to include a lot of charcoal into the layers of paint, that's why it's been applied so thickly on the canvas sketch. I also realised, just as I was about to start painting, that subconsciously I've probably absorbed his subject matter into my choice of subject matter, namely the reclined figure, half asleep. I was worried that this choice of child asleep would be seen as sentimental, but I'm hoping that by following in his vein, and keeping the colours muted, and the tonal contrast strong it will come across as more interesting than sentimental.

Monday 28 February 2011

Eugene Carriere


Eugene Carriere 1849-1906, Maternity. Oil on Canvas. 44 by 54cm. Location Musee des Beaux-Arts, Reims, France. From the Bridgeman Education Site.


I've seen one of Carriere's paintings in the National Museum and Gallery of Wales around three years ago, and the image was so striking for the deep shadowy areas and the piercing section of light.


I saw this image on the Bridgeman site and had to put it here. My portrait project at the moment is taking elements from Carrier's work, most notably the tonal contrast, limited palette, hazy light and the subject of children. Mine is of my son asleep so the lighting conditions are perfect for creating this kind of hazy effect, especially as I've been using my daughters night light torch to highlight areas of his face. The painting is more than life size and is interesting for the challenges it poses.


This painting of Carriere's is captivating for the swirling movement in the forms of the figures, creating a perfect curve up and around and back again. Swimming in a sea of sepia toned background the highlights of the features stand out like ghostly forms.

I've seen several versions of this composition, some are called studies and some look like a "finished" painting, so this image obviously captivated him. What I also love about his paintings, which I'm bringing out in my version too (after having painted most of my project with really thick paint recently), is the thin use of paint and how the canvas shows through in areas. It creates such a strong contrast between the areas of the figures and faces that have been painted so beautifully life like and then breaking through that illusion of life is the flicker texture from the canvas.

Friday 18 February 2011

Augustus John (1878-1961)


Edwin John by Augustus John 1911. Oil on Canvas. Owned by the National Museum of Wales, Cardiff, from the Davies Sisters Collection. Painted when Edwin was about six years old.


Edwin John 1940 by Augustus John. Oil on canvas. 52 by 48cm. Owned by the Fitzwilliam museum, Cambridge University. Copied from the Bridgeman Education site.

PORTRAIT PROJECT

I've recently been to the National Museum and Galleries of Wales in Cardiff to get a flavour of the different portrait styles there that could be incorporated into this portrait project. Thanks to a new wing having been recently opened in the Museum there is now a huge section of paintings from the 1900 onwards that are available to view.

Augustus and Gwen John stood out as the highlights for me of this new section. It was wonderful to see the paintings by Gwen on display having previously only seen them in the vaults of the museum when I visited there in May 2010. It's charceristic to see the backgound only partly blocked in, indeed it's unusual to see one of his paintings that has all of the canvas covered in paint. The 29 years that seperate these two paintings here don't show much stylistic differences, the later is slightly more loose, but there is still the emphasis on observation coupled with expressive application of paint. It's these elements that I will aim to bring out in my own painting for this project.

A separate room was also filled with drawings and etchings by Augustus John and I copied a couple for my logbook. The sketches and etchings also show elements of closely observed draughtsmanship coupled with free and loose use of line.


The top painting of Johns son Edwin is on display in the museum in Cardiff, along side several others of Johns family, friends and admirers. What struck me about this image was the vivid colours and the confident pose of the young boy. Information on the wall said that his mother, Ida John, thought of the boy as ugly with small blue eyes. In another room at the museum there is a sculpture of Romilly John, Edwin's brother, carved by Eric Gill. Romilly also shows the characteristics that his mother thought of as "ugly" but it strikes me as strange that what she viewed as ugly, his father and Gill thought of as art, enough that they created paintings and carvings of them. When I was in the museum I sketched the images of these two boys, one by John and one by Gill, for my logbook.

The second painting of Edwin above shows him at the age of 35, a handsome and striking man. A further historical fact about Edwin is that it was his aunt, Gwen John, who encouraged him to become a watercolour artist after a brief career as a middleweight boxer. After her death "he inherited the estate of his aunt Gwen and did much to secure her posthumous reputation." (From the Museum of Wales website, link below.) http://www.museumwales.ac.uk/en/art/online/?action=show_item&item=902

The Museum in Cardiff owns 126 paintings by Augustus, including a further 2000 works on paper by both Augustus and his sister Gwen. Born in Tenby West Wales it is fitting that the Museum of Wales is justifiably proud of these Welsh artists.

Tuesday 11 January 2011

Elfyn Lewis

http://news.bbc.co.uk/local/northwestwales/hi/people_and_places/arts_and_culture/newsid_8726000/8726798.stm

Just had an "Ah ha!" moment. Following links about Brenden Burns from Google led me to reading an interview with him, which I added to my post about him previously, where he mentions Elfyn Lewis winning the Welsh Artist of the Year award, the first painter to win it since 2005. Googling Elfyn Lewis then led to me to sites featuring his paintings and I immediately recognised them as the work of an artist I saw in the Eisteddfod last summer, 2010. They were only small paintings but caught my eye because of the unbelievably thick layers of acrylic paint used. The canvas was on a thick stretcher, about two inches, and the paint had been allowed to dribble down the sides, he must have painted on them horizontally. The site I've linked to above quotes him as saying he uses Squeegees, trowels and even cassette tapes to scrape the paint from top to bottom or left to right. The paintings that I saw in the exhibition had what looked like at least ten layers of paint layered one on top of the each other, and each one looked to have been left to dry before adding another layer. They were so tactile because they still looked wet and fluid. I felt too self conscious to have a go at copying the colour etc used in the painting into my sketchbook because there were so many people there (a pathetic excuse I know) but the memory of seeing the paintings is still very fresh in my mind.

http://www.bbc.co.uk/news/10322630

This link is to a BBC page which shows and talks about the winning painting for the Welsh Artist of the Year, and also mentions winning the Gold medal for Fine Art in the 2009 Eisteddfod in the Bala. This is obviously an artists to keep an eye on and I'm glad his paintings caught my attention.

http://www.elfynlewis.com/index.php?lang=cym&status=3


Here's his website, with a huge collection of his paintings. One of the paintings that I remembered seeing in the Eisteddfod was similar to Cae Melyn (Which means "Yellow Field" in Welsh). I just remember that intense yellow colour. I also remember something similar to Carno which had a small section in the top layer that only partly covered the thicker layers underneath, allowing then to show through.

Wednesday 5 January 2011

Lucian Freud Tenby Harbour 1944


Lucian Freud Tenby Harbour 1944 From Oriel y parc website, St Davids, West Wales.


Watercolour, crayon and charcoal on Ingres paper. It will be on display in the gallery until the end of March, 2011.


What surprised me is how little has changed from my version that I did of Tenby Harbour after going on holidays there last summer.


It looks like he was much higher up on the cliffs doing his version as the harbour wall and houses are seen from above, whereas as mine is ground level. Mine also shows the new addition of some kind of ramp that much be used for the life rafts.